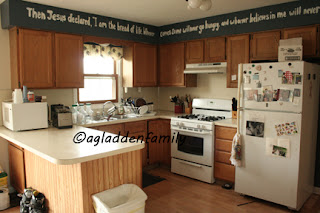
I finally decided to start the kitchen makeover process. After all is said and done, the counters will be painted and the cabinets stained a different color. Since we moved into the house, I've wanted to redo the kitchen, we just never had the funds to do so. Last winter, when looking around on pinterest.com, I came across a $250 kitchen makeover that looked amazing! She painted her laminate countertops and stained her cabinets. My husband and I agreed, that we could afford $250 to redo ours the same way. Phase 1 was the counters. They have been completely redone by paint and polycrylic! This is how I did it.
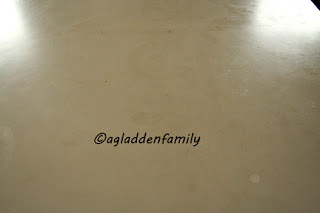
Before
Nasty old countertop! When we bought the house, the counters were stained - in the two years that we've lived here - we've added to it!
The edge of the laminate was falling off. I found some all purpose construction glue, and glued it back on.
I didn't like the metal trim that we had, and decided I was going to remove it all. This turned out to be a VERY bad idea! I *almost* ruined this piece of laminate.
I did finally remove this one piece of trim, cracking the laminate in the process. Thankfully the construction glue held this together as well! *phew*
First I cleaned the counters really good with a degreaser & an antibacterial cleaner. Then I sanded the surfaces, by hand! I used to have an electric hand held sander, but I couldn't find it - so by hand had to work... and it did, it just took me longer.
For almost three weeks, this was our 'counter' space.
I HATE painters tape... not the tape, but the process of taping! I'm really glad I took the time to tape everything off though! Saved me a lot of hassle with cleanup!
These were the materials used. Tinted primer, polycrylic, and 11 2oz acrylic paints (5 not shown - I had to purchase later). Also not shown are a 4 in paint brush, 1 1/2 in paint brush, 1 regular circle craft sponge cut into thirds, and 3 sea sponges of different sizes.
After I sanded the counters, I wiped them all down again to get the dust off. After they dried, I applied two coats of primer. This color serves as the base. Unfortunately, I picked out the wrong color. We had decided to go with a dark base originally, and when I picked out the paint colors, I forgot and went with a lighter color. In the end it all worked out though, thankfully!
All primed!
First I started with just a regular sponge. I had it cut into thirds and applied my first of 9 colors. There is no rhyme or reason to the pattern, just sponge away!
Still using a regular sponge, I added in the second color.
Then the third. This gave me the base of all my browns. However, I decided that I really didn't like the look of using the regular sponges and maybe the orginal poster had a reason for using a sea sponge. So off to the store I went to find some sea sponges.
What a difference the sea sponges made! The speckles were a different pattern and made it look more blended and stone like. When I bought the sea sponges, I also bought black acrylic paint to make it darker (to make up for the light base). This first dark color, I actually mixed black and dark brown so that it wouldn't be jet black.
Using the sea sponges for the rest of the colors, I added in orange, green and blue (those are the main colors of decor in my kitchen, dining & living rooms).
The first time I *thought* I was done. My husband didn't think it was dark enough yet though.
So I went BACK to the store, and bought more black, brown and added in a red (by request of husband). This is where I started to darken it, even more.
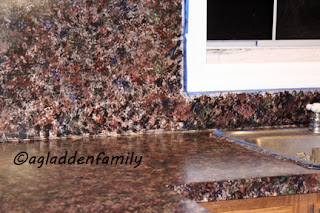
After I darkened it. All in all, I went over the entire area about 20 times! Between a total of 9 different colors, at least twice - once as a base, and then a second and or third time to accent/darken.
Before I applied the polycrylic.
After the polycrylic.
Right now, the backsplash has 3 coats of polycrylic and the countertops have 6. However, per husband's request, each will be getting about 4 more coats. He doesn't think the tops are smooth enough yet and the backsplash is shiny enough yet. The polycrylic and primer were both applied using the paintbrushes. You could roll the primer for a quicker step and to make it more even, but I couldn't find a roller, and really didn't want to spend more money than I had to.
All in all the cost breaks down as this:
package of 3 sponges and the first 6 acrylic paints: $1 (Michael's had a GREAT $5 off of a $5+ purchase coupon)
Tinted Primer $18
Polycrylic $44
Sea Sponges $6
5 added acrylic paints $3.50
Total for counters: $72.50
Plus I have a $5 rebate coming back for the polycrylic that I will use towards the stain for the cabinets. I have OVER half of the primer and polycrylic left as well :)
The reason I didn't show a full kitchen view of the final is because the cabinets have yet to be done, and I want to show off the full kitchen after those are done :)
Here is a link to the original blog that gave me the idea. I don't know how they did the counters for $20 - unless she already had the primer and polycrylic... http://prettylilposies.blogspot.com/2010/11/250-kitchen-makeover-with-20-granite.html
~~~~~~~~~~~~~~~~~~~~~~~~~~~~~~~~~~~~~~~~~~~~
Update May 18, 2012:
We still cannot use our counters. The tentative date that we will be able to use them is 7/4/2012. There are 10+ coats of acrylic and it still is not covered evenly without blemishes. The painters tape ripped off part of the acrylic & paint (down to the original countertop) when I removed it. And I couldn't remove it while it was still wet because of so many layers needing to be done. Am I happy with the color? yes! Am I happy with the final product? Not yet! Would I do this again? Probably NOT!
Oh yeah, and I've used almost the entire can of acrylic now!
~~~~~~~~~~~~~~~~~~~~~~~~~~~~~~~~~~~~~~~~~~~~~~
Update May 25, 2012:
The counters are officially done. I'm happy with the final product (it's still not perfect, but neither am I, so it will have to work - plus I'm sure no one else will notice the imperfections) :) Still can't fully use the counters until July 4, but at least I can see the light ;)


